Tuesday, October 12, 2021

Seitan KFC Drumsticks

This recipe is a mix of inspiration for the drumsticks from Lisa Kitahara, and using a modified version of the Lotus Cutlets recipe.

I think it needs a bit of tweaking, as I don't enjoy such huge chunks of seitan in a mouthful, so I probably prefer to make drumettes, which I will try next time.


Ingredients

Seitan

2 cups vital wheat gluten
2 TBS chicken salt
1 1/4 cup veggie stock
1 TBS sesame oil

To assemble

8 wooden skewers/chopsticks
8 sheets of rice paper

Coating

3/4 cup plain flour
3/4 cup self raising flour
3/4 cup cornflour
3 tsp paprika
3 tsp chicken style stock powder
3 tsp garlic powder
3 tsp dried thyme
1 1/2 tsp ground sage leaves
1 1/2 tsp turmeric
1 1/2 tsp ground ginger
1 1/2 tsp ground coriander seeds
1 1/2 onion powder
1/2 tsp black pepper
200-220 mls cold water

Method

  1. Place all seitan ingredients in a food processor and mix for a few minutes until combined.
  2. Knead to bring it all together and place in the fridge for an hour.
  3. If using the cocktail wooden forks that I used, assemble 8 as per the video. Otherwise cut the wooden chopsticks to size, no more than 4 inches in length.
  4. Cut the dough onto 8 pieces.
  5. Cut each piece lengthwise in three leaving the top uncut so the three pieces stay together, then plait it tightly.
  6. Starting really tightly, start to wrap it around your wooden support, wrapping more towards the top to resemble a drumstick. Tuck the end into the dough to keep from unraveling.
  7. Repeat with all the pieces of dough.
  8. Simmer the drumsticks in water for 15 minutes, turn over and simmer for another 15 minutes. Drain and allow to cool completely. You can place them in the fridge for a few days, they keep well.
  9. Soften the rice paper with hot water, and wrap each piece of seitan tightly. Repeat with all the pieces and set aside. You can refrigerate them for a day or two before doing the coating if you like.
  10. Mix all the coating ingredients together except for the water. Wisk them till well combined.
  11. Take out 1 cup of the coating mix into another bowl, and slowly add the water, to form a batter.
  12. Coat each drumstick with wet batter then coat with flour mix, set aside.
  13. Repeat for all drumsticks.
  14. Fry in hot sunflower oil.
  15. ENJOY!!!

Thursday, October 15, 2020

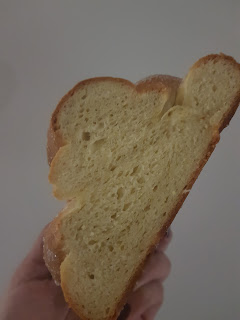
Plaited Challah Bread - Take 2


Since the first time I made this bread, I have been trying to simplify my recipes.

This version doesn't use a bread improver. If you want to see the original recipe and background, it is here. This has a much more acidy flavour, and the texture is like a cloud!


Ingredients

250gms Warm Soy Milk
95 gms Aquafaba
65 gms Sunflower Oil
1 tsp Salt
60 gms sugar
575gms Baker's Flour
40gms Vital Gluten Flour
25gms dry yeast
Pinch of turmeric (optional)


Method

  1. Place the ingredients into the bread maker in the order listed above.
  2. Set your bread maker to dough setting and wait until completed.
  3. Take the dough out of your bread maker and place on a well floured surface.
  4. Divide the dough into even pieces. You can divide the dough in as many pieces as you want to braid. 3, 4 5, 6. I decided to try 6 for this one.
  5. Place the finished plait on your tray and put in a warm spot to rise for 30 minutes.
  6. Preheat your oven to 200 C (400 F).
  7. Make your glaze and brush your bread all over.
  8. Place in the oven and lower your oven to 190 C (374 F) and bake for 30 minutes. If you find that your bread is browning too quickly, lower your oven to 180C (350F).
  9. Remove from the oven and set aside on a cake rack to cool down.


Glaze

3 Tbs Sunflower Oil
2 Tbs caster sugar

Mix together until combined and use to brush on the bread.

Enjoy!


Monday, July 20, 2020

Short Peanut Butter Cookies

Ingredients

240gms Self Raising flour
50gms Nuttelex (or other vegan butter/margarine that can be creamed)
65gms crunchy peanut butter
100gms raw caster sugar
4tbs (60gms) aqua faba


Method

  1. Preheat oven to 180 degrees Celsius.
  2. Prepare a cookie sheet by lining with baking paper.
  3. Sift flours together and set aside.
  4. Cream the nuttelex and peanut butter with a hand mixer or in a stand mixer, until light and fluffy.
  5. Start adding sugar to the butters mix whilst mixing, ensuring that it stays light and creamy.
  6. Add the aqua faba,  one tablespoon at a time, whilst you continue to mix. Ensure that each tablespoon is fully incorporated before adding the next. This will ensure that the nuttelex/sugar/aquafaba mix stays light and fluffy and doesn't separate.
  7. Using a spoon add all the flour to the mix and then gently fold in.
  8. Using a small scoop (i have a tiny one which is just like an ice cream scoop), scoop rounds onto the prepared baking sheet leaving about an inch of space in between each.
  9. Bake for approximately 15 minutes until just slightly coloured.
  10. Remove from oven and allow to cool.
  11. Melt the chocolate over a bain marie or in the microwave. 
  12. Drizzle chocolate over cookies and allow to cool completely.

Sunday, July 19, 2020

Baked Cheesecake

Ingredients

Base

1 packet gluten free arrowroot biscuits (Woolworth's ones are vegan)
70 gms of nuttelex
50 gms instant oats


Filling

300 gms raw cashews (boiled for 20 minutes/drained/rinsed)
450 gms firm tofu
330 gms soy milk
200 gms sugar
1 tbs vanilla
2 tsp grated lemon rind
3 tbs fresh lemon juice
90 gms no egg


Method

  1. Line a 23cm spring-form pan with baking paper.
  2. Place base ingredients into a food processor and process until fine crumbs form. Press firmly into prepared pan and place in the fridge whilst you prepare the base.
  3. Preheat oven to 160 degrees Celsius.
  4. Boil 2-3 litres of water and place in the oven in a large pan (large enough to comfortably fit your cheesecake pan - this is your water bath).
  5. Place boiled cashews into a powerful blender and process with milk, vanilla, lemon rind and lemon juice until smooth.
  6. Slowly start adding the tofu in cubes and the sugar.
  7. Once all incorporated and smooth, pour out into a bowl and fold in the no egg, and lemon rind.
  8. Smooth the tofu/cashew mix over the biscuit base, and place in water bath in the oven.
  9. Lower temperature to 100 degrees Celsius.
  10. Bake for 2 hours (the top should not colour).
  11. Once baked, allow to cool in the oven, then place in the fridge.
The top of this cake might end up cracked. Using a palette knife, gently scrape it over the top of the cake, which will fill in the cracks and leave you with a smooth cake.
Top with strawberries, coulis, passion fruit or other fruit or serve on it's own.

Saturday, September 15, 2018

Upsidedown Peach Cake


Ingredients
460 gms self raising flour
300 gms caster sugar
120 gms sunflower oil
40 gms white vinegar
2 cups (500mls) of full cream soy milk
2 tsp vanilla essence
1 410gm of sliced canned peaches (drained)
2 TBS raw or brown sugar


Method

  1. Prepare a 9 inch spring-form pan, by lining with baking paper and set aside.
  2. Preheat oven to 180 degrees celcius.
  3. Sprinkle raw or brown sugar evenly over the bottom of the pan.
  4. Gently place the drained peaches on the tin base in whatever pattern you like.
  5. In a bowl mix together the dry ingredients, wisk and set aside.
  6. In a glass jar, mix together the wet ingredients, whisk.
  7. Pour wet ingredients into the dry and gently whisk together until combined.
  8. Gently pour cake batter over the peaches. Bake for 45 minutes or until done when tested with a wooden toothpick. Wooden toothpick will come out clean.
  9. Set aside to cool for 20 minutes before removing the sides of the pan. Place on a cake plate upside down, and sprinkle with icing sugar.
    Server warm with ice cream or cold with a nice cuppa. ENJOY!!!

Sunday, July 8, 2018

Sweet buns with vanilla custard

I made these today not expecting them to be a hit. They were a hit, and now many people are asking for the recipe. This recipe is a variation of my challah recipe.

I made these using a bread machine, but many readers have tried making the challah by hand and it has worked for them.

I personally like using the bread-maker because I am terrible at kneading. I need to strengthen my biceps!!! If you need help as well but dont have a bread-maker, you can also use a stand mixer with a dough hook. Once kneaded, let the dough rise for 40 minutes in a warm spot.

I used 250ml cups(metric), 5ml teaspoons, 20ml tablespoons (metric).

I normally weigh all my ingredients. I will provide those measurements at some later date when I make these again, as I didn't have my scales with me when I made these.

By the way, this recipe makes a LOT of buns, 18-24. You may want to try half, unless you have a hungry family, or co-workers. I am not sure how they are once cool. We scoffed a lot of them warm. We'll see how the remaining few are tomorrow morning.


Ingredients


IngredientsVolume
(Metric Cup/ 20ml Tablespoon)
Warm Soy Milk1 Cup
Aquafaba6 tablespoons
Oil1/4 Cup
Vanilla2 teaspoons
Sugar1/4 Cup
Flour3 3/4 Cups
Yeast1 Tablespoon
Bread Improver1.5 Tablespoons
Tumeric (Optional)1/4 teaspoon
Lemon Rind (grated)1/4 teaspoon
Also needs 3 tablepoons of melted nuttelex (or other vegan butter replacement), and 3-4 tablespoons of sugar to brush onto once partially cooked.

Method

  1. Place the ingredients into the bread maker in the order listed above.
  2. Set your bread maker to dough setting and wait until completed.
  3. Take the dough out of your bread maker and place on a well floured surface.
  4. Divide the dough into 18 to 24 pieces. Depending on the size you want them. I gave a little under half the dough to my daughter who made really tiny buns, and I made 12 out of my dough. Roll into even balls and place on a baking tray with about an inch gap in between each. Give them room to rise.
  5. Place in a warm spot to rise for 30 minutes. I covered mine with a dry tea towel and placed them in front of our fireplace.
  6. Preheat your oven to 200 C (400 F).
  7. Place buns in the oven and lower your oven to 190 C (374 F) and bake for 15 minutes. If you find that your buns are browning too quickly, lower your oven to 180C (350F). Brush with melted nuttelex, sprinkle with sugar and bake for another 5 minutes.
  8. Remove from the oven and set aside to cool on a cake rack for 15 to 20 minutes..
  9. Cut a slice on an angle on each bun, and pipe some custard into them.
  10. Refrain from scoffing them all in one sitting. My non vegan partner inhaled 3 of these before they were even cold. You have been warned!!!

Vanilla Custard

Ingredients

3 cups of soy milk
1/2 cup of sugar
3/4 cup of cornflour
1 tablespoon of vanilla
3 tablespoons of nuttelex
1/4 tsp turmeric (optional for color)

Method


  1. Reserve 1/2 cup of milk, and place the rest in a pan to heat on the stove.
  2. Add sugar, vanilla and turmeric(if using). Mix until sugar is dissolved.
  3. Whilst heating milk, place cornflour in a cup and add reserved milk. Mix until a smooth mix is achieved.
  4. Once the milk is steaming (but not boiling), pour in cornflour mix. 
  5. Using a  wooden spoon continue to stir until thickened. 
  6. Add nuttelex and turn off the heat. 
  7. Mix nuttelex until completely incorporated.
  8. Allow custard to cool. 
  9. Once your buns are ready, place your custard in a bowl where you can whip it slightly with a hand or stand mixer. The point of this step is to make the cooled custard smooth, and ready for piping into the buns. 
  10. Place in a piping bag, and pipe into buns.
NOTE: This custard is awesome for vanilla slice. I use it all the time. I will share the very simple recipe in the next few weeks. It is my partner's favourite vegan sweet.

Sunday, July 1, 2018

Vegan Bread Improver

In 2016 after discovering aquafaba, I went on an experimentation spree.
I tried making vegan croissants, donuts, challah, bread rolls, you name it. I found that a lot of recipes that I wished to convert, used bread improvers.

Many people claimed that the bread improvers were a gimmick. I listened, and tried some of the recipes with and without the bread improvers. The results spoke for themselves. Bread improvers were a must as far as i was concerned.

I found a commercially available one, but found out later that it was not vegan, this was confirmed by the company.

So i went in search for a recipe for one, and found one in a blog named Tammy's Recipes. I had linked directly to that recipe, but unfortunately that website has been down for some time.

I was able to find a recipe which seems to have been inspired by the one on Tammy's blog.

I am posting here since Tammy's is no longer available.

I made a big batch of this (4 times the recipe below) and stored it in an airtight container so that I can use it on my breads, donuts etc whenever I need it, without having to mix it each time.

Ingredients

50gms wheat gluten (Gluten Flour)
5 gms psyllium husk
1/8 tsp ground ginger powder
1/8 tsp citric acid

Method

Blend together, and use as required by the recipe.