Thursday, October 27, 2016

Spelt bread rolls

Ingredients

170gms cannellini bean aquafaba
140gms warm soy milk
30gms oil
3 TBS Rice Bran Syrup
1 tsp salt
560gms white spelt flour
1.5 TBS Wheat Gluten
1 tsp psyllium husk powder
1 pinch of powdered ginger
1 pinch of citric acid
2 tsp dry yeast

Method

  1. Sift together the spelt flour, wheat gluten, psyllium husk, ginger & citric acid. Set aside.
  2. Place ingredients into your bread machine in the order listed above, then add the dry sifted ingredients and finish with the yeast.
  3. Turn your machine to the dough setting.
  4. Remove dough from the machine once it has risen, and punch down, cut into 10 pieces and roll into balls or other desired roll shape.
  5. Place rolls on a tray covered with baking paper.
  6. Cover rolls with a clean tea towel and set in a warm place to rise (for about 30 minutes).
  7. Preheat oven to 200C.
  8. Optional: Whisk together 2 TBS of olive oil and 2 TBS soy milk, brush on the top of the rolls, and sprinkle with sesame or poppy seeds.
  9. Bake rolls for 20 minutes or until they've developed a nice golden colour.
  10. Eat warm with soup or buttered or however you like.
Enjoy!!!


NOTE: If you want to do the knot keiser shape and haven't done it before, have a look at youtube, they have a lot of keiser roll recipes where they show how to shape them.


Friday, October 14, 2016

Donuts

Weeks! It's been weeks since I've been  meaning to try making donuts again. The first time I made them, a few months ago, they were too heavy. I figured that making the dough with the breadmaker would help. AND IT DID!!! Plus I found a better recipe.

It is so simple, probably can be done a lot quicker than what I did. But I just wanted to make the dough the previous night, and then cook them in the morning. I combined a few different methods that I read about.

Some notes on the ingredients. You may be wondering why I used psyllium husk, ginger and citric acid. Or you may not, but I'm going to tell you anyway.

I few weeks ago, when I started baking breads, I read about bread improvers. I used a commercially available one which I thought was vegan, but then the manufacturer confirmed that one of the ingredients was not. So that ingredient was abandoned.

A lot of people who are not in Australia were also asking where to get a bread improver, so I did a little bit of research and found a home made one which I have been using a variation of,  in all my bread making.

This is the article about it. It uses lecithin granules, ginger, citric acid and wheat gluten. However I did not have lecithin granules, and I had read in another article that psyllium husk was a good bread conditioner. So I used that.

*Psyllium husk is quite coarse, so I blended a cup in a nut grinder (but you can use a blender) and have stored it in an air tight jar. I use it whenever I make breads now. I have also started using it for cakes, all recipes in experimental stage.

For those of you with little kids, psyllium husk makes a really great easy to do slime. My five year old loves it, and it's a lot better than the nasty chemical filled ones you can buy from the shops.

**************************************************************
Update - 16/10/2016
**************************************************************
I originally had the thickness of the dough at 1/4 inch, however this morning I tried it at 1/2-3/4 inch and it is a lot better. I have edited the recipe to that thickness.
**************************************************************

Ingredients


8 TBS aqua faba (from chickpeas)
1 cup of warm soy milk (I use Soy Milky)
1/2 tsp vanilla
1/3 cup of sugar
1/4 cup of sunflower oil

Sift together
4 cups of plain flour
4 TBS wheat gluten (vital gluten)
2 tsp psyllium husk powder*
1/8 tsp of ginger powder
1/8 tsp of citric acid

3 tsp yeast

Rice bran oil or other oil without strong flavour for frying.

Method

Breadmaker


  1. Place ingredients in the breadmaker in the order listed above, starting with the aqua faba, and finishing with the sifted dry ingredients, and the yeast on top.
  2. Start the dough setting, let the dough rise. The breadmaker I have mixes and kneads (30 minutes) and then rises (1 hour).
  3. Remove dough from breadmaker. (if you want to make them right away, then go to step 5)
  4. Punch down the dough, form into a ball and place in a large oiled bowl. Cover with plastic wrap and place in the fridge overnight.
  5. Lightly flour your bench/table and place dough down. Punch dough down and roll out to about 1/2-3/4 inch in thickness. 
  6. Cut into desired shapes and place on a baking tray lined with non stick paper. Cover with plastic wrap and place in a warm spot to rise for an hour.
  7. Heat oil in a deep pot or frying pan. You need enough oil so that when the donuts are placed in, they are floating and not touching the bottom. Pinch a small piece of dough and place it in the oil, if it floats to the top, with bubbling oil around it, the oil is ready for frying.
  8. Place your donuts in the oil, and cook them on each side for a few minutes. If they start to brown too quickly then the oil is too hot.
  9. Remove from oil, drain on kitchen paper, and then dust with sugar or fill as desired.

Hand Method

  1. Place milk, sugar and aqua faba in a jug. 
  2. Add yeast, and mix, set aside for 10 minutes to proof.
  3. Make a well in the center of your dry ingredients, and pour in yeast/milk mix, add vanilla and oil. Mix together to form a dough.
  4. Knead on a floured surface for 15 minutes until the dough becomes smooth and elastic. You can do this on a stand mixer, as the dough is quite firm.
  5. Place dough in an oiled bowl to rise in a warm spot for 40 minutes.
  6. Follow steps 4-9 above if you are not making them right away, otherwise steps 5-9.

These can be filled with caramel, raspberry jam or rolled in caster sugar with cinnamon. I only fried half of the dough this morning, the rest of the dough is in the fridge for tomorrow. I will ice those with aqua faba icing, and put some sprinkles. I will share pictures when done.

Let me know in the comments if you have any questions.

Enjoy!!!


Friday, October 7, 2016

Vegan lemonade scones

These scones are super easy. Until I discovered this recipe when I was vegetarian, I had never made a light and fluffy delicious scone. I can bake, but scones were my enemy. Then I discovered this recipe.

When I made them last, instead of using lemonade, because I had none, I used sparkling mineral water, some sugar and lemon juice. They turned out fantastic.

However this time I had lemonade on hand.

I also tried to make a whipped butter/clotted cream to go with it. That was ok, not fabulous, but I will share the recipe anyway, as it is lighter than just using margarine.

I got the Alpro soy cream from IGA (Brunswick Supa IGA). The Cruelty Free store also stocks it, and other IGAs stores that stock vegan items, should have it too.

I would love some tips on the whipped cream. I am not a fan of the coconut one for scones, because it is not light enough. Anyone out there made a successful whipped cream type topping?

I think a tablespoon of sugar and a 1/2 tsp of salt would make the flavour of the scones better.

Scones

Ingredients


3 cups of plain flour
3 tsp baking powder
1 cup of lemonade
1 250ml container of vegan soy cream.

Method


  1. Preheat oven to 180 degrees celcius.
  2. Sift flour and baking powder together in a large bowl.
  3. Pour cream and lemonade into a jug.
  4. Make a well in the center of your flour mix, pour in lemonade and cream. Stir with a flat knife or spatula until combined. If your mix is too wet, put one tablespoon at a time of extra flour. 
  5. Knead lightly for about 10 seconds till the dough comes together. You do not want to over knead or they will turn out tough. The less you have to knead, the better. Roll out the dough to 3 cms thickness. Cut with a round cutter.
  6. Place on baking tray and bake for 15 minutes.
  7. Serve with butter/cream and jam.

Whipped Butter

Ingredients

35gms Nuttelex (Coconut)
2-3 TBS aqua faba
4 tsp icing sugar


Method


Whip the nuttelex in a small jug. I have a balloon type whisk that attaches to my stick blender. It is perfect for this. Then start adding the aqua faba one teaspoon at a time, until you get the desired consistency. You can actually make the nuttelex stretch quite a bit, as in increase in volume, it is a lot lighter but not like whipped cream at all. More like a whipped butter. Add sugar to taste, and whip. Serve on scones.


Saturday, October 1, 2016

Dairy Free Croissants

I love croissants. I haven't had one for close to a year. I have been vegan since January, and haven't had one since, and probably for some months prior to that.

I have seen some lovely croissant recipes, but they take days to make. I am a very impatient person and I also do not have the time to spend days on a recipe. It would mean not cooking anything else hahaha.

So I went in search of a recipe that could be done within a day and then set on veganising it.

When I was making challah last week, I came across "The Bread Kitchen". The lady that owns the channel is so charming, and although it is not a vegan channel, she has quickly gained me as a fan.

I watched a few recipes from other channels, and got some ideas from those also. Titli Nihaan's recipe is done by hand. I wanted to make mine in the bread maker, so that when I was making the dough, I could also work on something else (seitan steaks).

So it is 100% possible to make this by hand, the bread maker is absolutely not required.

I will explain the recipe as I made it, and then you can see Nihaan's method for making the dough by hand, although those of you that make bread, the method is the same.
  1. Warm the milk, add the yeast, mix and let it sit for 10 minutes until frothy.
  2. Sift all dry ingredients together set aside.
  3. Add aquafaba to yeast/milk mixture.
  4. Make a well in the center of your dry ingredients, and pour the milk/aquafaba/yeast mixture in.
  5. Knead to make a nice elastic dough. Rest for 10 minutes.
  6. Follow from step 7 in the Method below.
Some notes on the ingredients.
I decided to try a homemade Bread Improver as per this recipe. This is because the commercial bread improver is hard to find, and even harder to find a vegan version. I also thought that making it from scratch would make it a lot easier for everyone to follow the recipe.

Now the improver recipe calls for lecithin, and I didn't have any. I had read in another recipe that the baker used psyllium husk as a bread improver. I decided to use psyllium husk instead of Lecithin. I find that psyllium husk is quite coarse, so I have put a cup of it in my seed/coffee grinder, and ground it up to a powder. I use that whenever a recipe calls for psyllium husk. You can blend it in your blender as well.

I used Nina's Vegan butter made with aquafaba. I would suggest that you make that first, as it does take time to set. I made it as I was making the dough and in between other things, so it was quite soft when it came to put it on the dough. It obviously still worked, but I don't think it is ideal.
I recommend making the butter with deodorised coconut oil. I didn't have any, and the coconut flavour is very noticeable. The taste overall of the croissant is great, but they would be better without the coconut flavour through it, as it would taste more legit.

When you make the butter, do not set it in a container, spread it onto some parchment paper on top of a baking tray or a plate. Spread it to a large square size, about 1/4 inch thick. Cover it and put it in the freezer. Then set to making your dough.
I didn't use apple cider vinegar in the butter recipe, but citric acid. I don't think this makes a difference. I also didn't add any colouring (tumeric) as the butter was for the croissants and it didn't really matter what the colour was.

Ingredients

400gms plain white flour
250mls soy milk
60gms caster sugar
1 tsp salt
2 tsp yeast
6 TBS aquafaba
Bread improver

Homemade Bread Improver (Adapted from this recipe)
1/2 tsp psyllium husk powder (Blended up psyllium husk)
3 TBS Gluten Flour (or Vital Wheat Gluten)
Pinch of citric acid
Pinch of powdered ginger


Method


  1.  Make Nina's butter. Do not put it in the fridge to set. Instead spread it on a piece of parchment paper on top of a plate or baking tray. Make it about 1/4 inch in thickness. Cover with plastic wrap and place it in the freezer. If you're making the butter the day before, then there is no need to set it in the freezer. The fridge will be sufficient. If the butter is rock solid, let it come to room temperature before you go on to step 8 below.
  2. Sift all dry ingredients together except for the sugar and yeast.
  3. Place the milk, aqua faba, and sugar in the bread maker.
  4. Place the flour mixture on top, and then add the yeast.
  5. Set your bread maker to dough setting, stop the bread maker once it has kneaded the dough, you DO NOT want it to rise.
  6. Take the dough out of the bread maker and wrap it in plastic and rest it for 10 minutes.
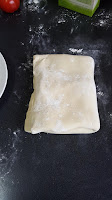
  7. Roll out the dough to a rectangle, double the length of the square of butter you made previously. Place the square of butter in the middle of the rectangle, and fold the dough over to cover the butter. Pinch the sides to seal in the butter.  Fold it in half again as pictured, Place dough in a plastic bag, and put in the fridge for 45 minutes.
  8. Take dough out of the fridge, and roll into a rectangle, fold as pictured, and place it back in the bag and into the fridge for 1 hour.

  9. Repeat step 8 one last time and leave the dough in the fridge for one hour.
  10. Take dough out of the fridge and roll out into a rectangle. Cut in half, and cut each half into triangles. I didn't measure, I just did it by eye. It is not an exact science unless you want each of your croissants to be the exact same size. In the "Bread Kitchen" video it is recommended to make a small cut on the short side of the triangle to make it easier to fold into a crescent shape. Stretch the long side of the dough as pictured and roll into a crescent shape.
  11. Place your croissants on a tray and let them proof for up to three hours on the kitchen bench. Alternatively (as I did) you can place them in the fridge overnight (cover your tray with plastic wrap). When it comes to baking, leave them on your kitchen bench for up to one hour so they can come to room temperature.
  12. Preheat oven to 180C-350F.
  13. Bake for 20-25 minutes until they've reached a nice golden colour.
  14. Place on a cooling rack for 10-15 minutes. They can be eaten warm or cold. I prefer them cold.